
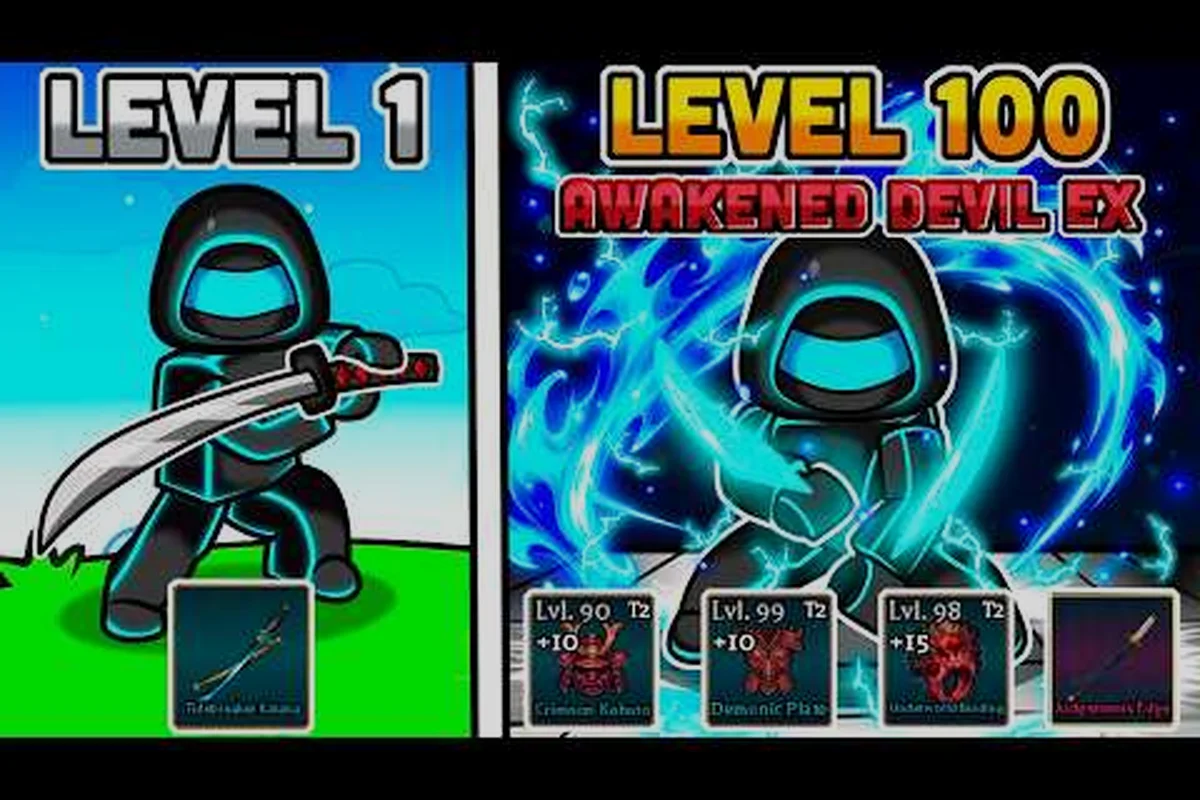
Going solo in Dungeon Lootr is a different beast from queueing up with friends: you control the pace, you keep every drop, and you learn the dungeon loop on your own terms. The trade-off is that the game punishes sloppy play harder when nobody else can cover a bad pull or a missed dodge. This guide lays out the full Dungeon Lootr solo progression path, from the very first class spin all the way to the 100-floor Boss Rush grind, with the class picks, dungeon tactics, and mistakes that separate clean extractors from a graveyard run.
Before diving in, bookmark the official Dungeon Lootr page on Roblox so you can check live stats, patch notes, and the developer's current roadmap from ClickBytes. Community testing cited below comes from players running the 2026 release build, so numbers reflect the live state of the game as of early September.
The Solo Progression Path From Level 1 to 100
Solo play in Dungeon Lootr is structured around a tight loop: spin for a class, clear a dungeon, kill the multi-bar boss, pick two of three reward chests, extract, then spend your loot at the Forge. Every system in the game feeds that loop, so understanding the order of operations is the first step toward efficient solo progression. The path below assumes zero carried gear and zero friends, which is the worst-case scenario for a new player and the one this guide optimizes for.
The total ceiling is Player Level 100, and each level unlocks access to higher dungeon tiers with better drop pools. Rushing straight to hard dungeons is the fastest way to get one-shot, so the loop below is paced for a solo player who wants to reach max level without burning through repair materials.
Phase 1: Levels 1 to 20 (Tutorial Tier Dungeons)
Your first twenty levels are spent almost entirely in the Tutorial Tier dungeons that appear in the lobby. These short, linear dungeons introduce hallway clears, the multi-bar boss pattern, and the chest-extract decision. Runs here are fast, lasting roughly three to five minutes, which is intentional: the game wants you to learn the extract loop through repetition.
Focus on three habits during this phase: treating every Tutorial Tier chest as a Luck test (compare blue vs. purple drop rates once you hit level 10+), always hovering the extract prompt before looting so you don't accidentally trigger a boss on a half-broken weapon, and resisting the lobby portal until your repair cost is under 20 gold — these small disciplines compound into a clean Phase 2 transition where most solo players reset back to Tier 1.
-
Run dungeons at your level or one tier above. Going two tiers higher for a "challenge run" before level 20 just throws your repair bill through the floor.
-
Stack Luck on every piece of gear you can afford. Luck improves chest quality and drop rarity, and the difference between a blue and a purple weapon in the early game is the difference between a clean Phase 2 and a frustrating one.
-
Save at least 30% of your gold for the Forge. The temptation to reroll classes every spin is real, but a cheap weapon upgrade at the Forge moves your clear speed further than a mid-tier class swap.
Skipping Phase 1 to chase mid-tier dungeon loot before level 20 is a trap the extract system punishes directly: a Tier 3 boss at level 15 can easily one-shot a green weapon, forcing a 40+ gold repair that wipes out your Forge savings and pushes you back to the lobby tutorial loop with broken gear and no Luck stack. The early grind isn't filler — it's where you bank the 30% gold reserve, lock in your Luck gear, and learn the multi-bar boss timing so Phase 2 starts with a clean extract economy rather than a wipe cycle.
Phase 2: Levels 20 to 50 (Mid-Tier Dungeons and Class Specialization)
Around level 20, the Mid-Tier Dungeons open up, and the difficulty curve sharpens noticeably. Hallways now have elite packs with telegraphed AoE, and the multi-bar bosses start layering mechanics on top of damage. This is also when class identity really matters, because the bonus stats from a high-rarity class start to outweigh raw weapon upgrades.
The smart move is to lock in one or two classes you enjoy and start pushing them into the Forge/Reforge system. The Forge can reroll substats on a weapon, and a well-rolled substat line (crit chance, attack speed, life steal) multiplies your effective damage without changing your class. For solo players, life steal is the king substat because it lets you skip a dedicated healer slot in a hypothetical team comp and just out-sustain the boss.
Around level 35, the Boss Rush mode unlocks as a side activity, and it is the single best source of Blessings and Titles per minute. You do not need to clear floor 100 on your first attempt; even pushing to floor 25 reliably gives you the resources needed to fund your next ten levels of gear.
Phase 3: Levels 50 to 100 (Endgame Dungeons and Boss Rush Push)
Levels 50 to 100 are where the solo progression test really lives. Endgame dungeons have modifiers, larger elite packs, and bosses that chain mechanics across phases. A wipe here costs you the entire run, so a clean extract becomes more valuable than a risky chest pick.
At levels 50 to 100, the endgame solo loop resets around three core decisions per run: which Endgame Dungeon modifier to engage (Frost, Frenzy, or Unyielding, each scaling mob HP or incoming damage by roughly 1.2x to 1.5x), whether to extract the chest or push the boss room for a Blessing drop (chest runs average 90 to 120 seconds, boss kills add 4 to 6 minutes and risk wiping the run), and when to bank gold into the Forge versus rerolling for a higher-rarity class via Lucky Spin, since a Rare-to-Epic class upgrade alone can shift your clear-time DPS by 20 to 30 percent on the same Level 90 modifier set.
-
Run one Endgame Dungeon to extract gear and titles.
-
Spend the gold on Forge upgrades or a Lucky Spin for a higher-rarity class.
-
Dip into Boss Rush for Blessings, then return to Endgame Dungeons with the Blessing buff active.
-
Repeat until you crack the Level 100 cap, then pivot entirely to Boss Rush pushing for leaderboard ranks.
The reason this loop works for solo players is that every system (Blessings, Titles, Forge, Reforge) feeds back into either damage output or survivability, so a single good run can snowball your entire kit. Endgame players who hit a wall are almost always missing one of those four systems, not under-leveled.
Best Class Picks for Solo Progression
Class is the single biggest lever a solo player has, because no teammate is around to cover a bad matchup. The full class roster has 30+ anime-inspired options ranging from Common to the 0.05% Exotic Sinister Trigger, but rarity is only half the story: some classes scale far better when you cannot rely on a support player to bail you out.
For solo play, you want classes that either self-heal, have built-in damage reduction, or burst down bosses before mechanics can snowball. The table below summarizes the most reliable picks for a solo progression run, based on community tier lists and player-reported data from the live build.
| Class | Rarity | Solo Strength | Why It Works | Best Phase |
|---|---|---|---|---|
| Berserker | Rare | High | Self-heals on low HP, high burst damage | Phase 1 to Phase 3 |
| Paladin | Epic | High | Shield + sustain, forgiving on bad pulls | Phase 1 to Phase 2 |
| Assassin | Epic | Medium-High | Burst windows line up with boss phase transitions | Phase 2 to Phase 3 |
| Necromancer | Legendary | High | Minion tanking absorbs boss mechanics | Phase 2 to Phase 3 |
| Sinister Trigger | Exotic (0.05%) | Extreme | Top-tier scaling, but unreliable to obtain | Phase 3 only if obtained |
| Mage | Rare | Medium | High AoE, but glass-cannon without a healer | Phase 1 to Phase 2 with care |
A few notes on the table. Berserker is widely considered the safest solo class for new players because the low-HP heal triggers on multiple boss mechanics, letting you out-sustain mistakes. Necromancer is the best "set and forget" pick for players who want their minions to soak mechanics while they focus on dodging. Sinister Trigger is the dream class, but at a 0.05% drop rate you should never plan around obtaining it during progression; if you pull it, treat it as a windfall and pivot to Phase 3 immediately.
How to Spend Your Spins
Spins come in two flavors: standard spins, which have a higher Common-to-Rare droprate, and Lucky Spins, which skew the droprate toward Epic and Legendary. For a solo progression run, the smart spend is: standard pulls bulk up your class collection in the early phases so you can actually equip passives from each archetype, while Lucky Spins are the only realistic path to the Epic and Legendary classes that gate late-game damage breakpoints — so treat them like a contested resource and match the currency type to the phase where the resulting drop will actually move your clear timer.
-
Burn standard spins during Phase 1 to fill your class roster and unlock passives.
-
Save Lucky Spins for Phase 2 when Epic and Legendary classes meaningfully change your clear speed.
-
After level 50, stop spinning unless you have spare currency. The Forge and Reforge will move your damage further than chasing a new class.
This sequencing keeps you from bleeding resources chasing a dream drop before your kit can actually use it — for example, pulling a Legendary class at level 12 sounds exciting, but without a leveled Common or Rare to trigger its passive chain and without enough shards for Reforge attempts, that pull becomes a trophy rather than a damage source, and the spins spent on it are spins you can't recover for the Phase 2 window where Epic and Legendary drops actually start moving your clear timer past the 2-minute mark.
Dungeon Strategy: Hallways, Bosses, and the Extract Decision
Every dungeon in Dungeon Lootr follows the same three-act structure: clear hallways, fight the multi-bar boss, and pick two of three chests before extracting. Knowing each act is what separates a clean solo run from a wipe at the boss door. Players who want to internalize that three-act rhythm should work through our Dungeon Lootr New Player Guide, which breaks down the optimal chest-pick priority and boss-phase positioning for every dungeon tier.
Act 1: Hallway Clears
Hallways are linear packs of trash mobs leading to either a reward chest or a potion cauldron at the end. The mistake most solo players make is trying to pull the whole hallway at once, which works in a four-man group but gets you killed solo because nothing body-blocks the damage.
The clean hallway approach is fundamentally a damage-control discipline: solo players in dungeon lootr must treat each 3-mob pull as a discrete combat encounter with its own threat cycle, because trash packs hit roughly 60-80% as hard as a same-tier elite without any of the body-block or cleave-down mitigation a four-man group provides, so pulling the full hallway in one opener dumps overlapping cooldowns onto a character with no external shields and almost guarantees a death before the first cauldron even enters your line of sight.
-
Pull two to three mobs at a time using an opener that holds threat.
-
Clear the pack, reposition, then advance.
-
Always end a hallway by checking whether the reward is a chest or a cauldron, and take the cauldron if your HP is below 70%.
A cauldron heal before a boss fight is the single highest-value action in the early game, because the boss fight is where solo players actually die, not the trash. Most wipes in Act 1 hallway clears trace back to entering a boss room at 50-60% HP after a sloppy pack clear, then eating a scripted frontal or enrage burst with no cushion — the cauldron exists precisely so you never face that scenario. Treat every chest-or-cauldron roll as a mandatory waypoint: if the cauldron spawns, you drink; if a chest spawns instead, you have already banked enough HP discipline to skip it safely. This single habit is the highest-leverage fix in any dungeon lootr solo progression checklist, because it converts a coin-flip survival check into a guaranteed full-HP pull.
Act 2: The Multi-Bar Boss
Multi-bar bosses are the centerpiece of the dungeon loop. Each bar has its own mechanics, and the bar transition often includes a vulnerability window. Solo players should treat every bar as a separate fight: burn the first bar while learning the telegraphs, save cooldowns for the second bar, and pop everything on the third bar once the boss is locked into a long animation.
The most common solo death is overcommitting during a bar transition. The boss telegraphs the next phase with a tell (usually a wind-up AoE), and players who keep hitting instead of dodging lose 60% of their HP for free. Discipline here is more important than raw damage.
Act 3: The 2-of-3 Chest Pick
After the boss dies, three reward chests spawn and you must pick two before extraction. The third chest vanishes the moment you leave the dungeon, which means every run forces a real trade-off rather than a free triple-roll — a core design pillar of the Act 3 2-of-3 chest pick. For solo progression, the decision matrix below maps each chest type to the situation where it actually accelerates your next clear, and skipping the cosmetic slot is almost always correct unless you are specifically chasing a Title to unlock its Blessing.
| Chest Type | Best Use Case | Avoid If |
|---|---|---|
| Weapon Chest | Your current weapon is below your level | You already have a Forge-upgraded weapon |
| Armor Chest | Your defense is below the dungeon tier | You just got a Reforge roll on existing armor |
| Cosmetic/Title Chest | You are farming Titles for Blessings | You are starving for damage upgrades |
The general rule is: pick the chest that covers your weakest slot, and skip the cosmetic unless you specifically need that Title to unlock a Blessing. Cosmetics are tempting, but they do not help you clear the next dungeon faster. For the gear foundation that makes those chest picks matter, see our Dungeon Lootr Best Starter Setup, and once you hit the level cap, the Dungeon Lootr Solo Boss Rush guide covers the full solo climb.
Rookie Mistakes to Avoid in Solo Progression
The list below is the practical experience the community has collected over the live build. Each mistake has a direct, mechanical cost, and most of them only show up when you are playing without a team to compensate. Skipping these is the difference between a smooth Phase 2 grind and a frustrating one.
| Mistake | What Happens | The Fix |
|---|---|---|
| Running dungeons two tiers above your level | One-shot by elite packs, repair bill spikes | Stay at-level or one tier above |
| Ignoring the Forge in favor of spinning | Stale weapon, falling damage curve | Upgrade before re-rolling class |
| Picking the cosmetic chest over gear | Looks cool, but loses a power spike | Pick the weakest gear slot |
| Not saving cooldowns for boss phase 2 | Phase 1 burns resources, phase 2 kills you | Treat each bar as a separate fight |
| Re-rolling classes every spin | Bleeds gold, no class mastery | Lock two classes and learn them deeply |
| Skipping Boss Rush until level 50 | Misses Blessings and Titles | Run Boss Rush from level 35 onward |
| Pulling whole hallways at once | No body-block, takes unavoidable damage | Pull two to three mobs at a time |
| Fighting over chests with no plan | Wastes the 2-of-3 decision | Pre-decide which two slots to upgrade |
Two of these deserve a closer look. The first is re-rolling classes every spin, because it is the most expensive mistake in the early game. Every gold piece sunk into a reroll is gold that does not go into the Forge, and the Forge multiplies your damage across every class, while a single new class only helps if it happens to roll well. Locking in two classes by level 15 and mastering them will outperform a constantly-shifting roster every time.
The second is treating Boss Rush as a level 50 activity. Boss Rush unlocks around level 35, and the Blessings you pick up there apply to your normal dungeon runs. Players who wait until 50 are essentially playing the game with one hand tied behind their back, because the Blessing buffs are a flat damage and survivability multiplier that compounds across every extract.
Building the Endgame Solo Routine
Once you are north of level 50, progression becomes a routine rather than a checklist. The routine below is what solo players in the top 10% of the leaderboard run on a daily basis, and it works because every step feeds the next one. Tweak the order based on what the daily reward track emphasizes, but the structure stays the same.
| Step | Activity | Time | Output |
|---|---|---|---|
| 1 | One Endgame Dungeon run | 6-8 min | Gear, gold, Titles |
| 2 | Forge or Reforge the weakest slot | 2 min | Power spike |
| 3 | Boss Rush push to highest floor | 10-15 min | Blessings, leaderboard points |
| 4 | Spend Blessings on the weakest build axis | 1 min | Build optimization |
| 5 | Lucky Spin if currency allows | 1 min | Class RNG |
| 6 | Repeat until daily reset | - | Steady progression |
The key to this routine is that nothing is wasted. The Endgame Dungeon funds the Forge, the Forge funds the Boss Rush push, the Boss Rush funds the Blessings, and the Blessings fund the next End Dungeon run. If any step is skipped, the next step gets harder, and the loop falls apart.
A practical tip: cap your session at three full cycles, then stop. Endgame solo play is a stamina game as much as a damage game, and players who push past fatigue start missing telegraphs, pulling too many mobs, and dying on bars they would normally clear. The dungeon will still be there tomorrow, and a rested solo player clears faster than a tired one.
Frequently Asked Questions
Is solo progression in Dungeon Lootr viable without a squad?
Yes. Solo play is fully viable, and many of the top leaderboard players run solo because they keep all the loot and control the pace. The build around self-heal classes like Berserker or minion-tank classes like Necromancer covers the lack of a healer, and the Forge/Reforge system makes up for missing support buffs. The trade-off is that wipes are more punishing, so the mistakes to avoid in solo progression tend to compound harder than in a group.
What is the fastest way to learn the game as a solo player?
Run the Tutorial Tier dungeons repeatedly until the hallway, multi-bar boss, and 2-of-3 chest loop feels automatic. The solo progression path is designed to teach the game in that exact order, and players who try to skip straight to Endgame Dungeons end up relearning the basics with a much higher repair bill. The Dungeon Lootr learn-the-game curve rewards consistency, not speed, so lock in one class, master one dungeon tier, then move on.
What should a new solo player know before their first run?
Everything you need to know boils down to four things: stay at-level for your first 20 levels, stack Luck on every gear slot you can afford, save at least 30% of your gold for the Forge, and treat every bar of a multi-bar boss as a separate fight. Skip those rules and the solo progression path becomes a grind against your own mistakes instead of against the dungeon. Follow them and the level 50 unlock feels like a natural next step rather than a wall.
Can you reach level 100 solo, and how long does it take?
Yes, level 100 is reachable solo. Community reports from the live build put the average solo time at roughly 25 to 40 hours of focused play, depending on class luck, Forge rolls, and how much Boss Rush is mixed in. Players who push Boss Rush from level 35 onward tend to hit the cap on the faster end because Blessings compound across every extract. The 100-floor Boss Rush itself is a separate grind that starts after you hit the level cap.